
How to install both Forge and OptiFine - JE1.7.10
0. Introduction
This article explains the procedure for using MiniaTuria in Minecraft (JE1.7.10) with Mods.
1. First, install "Minecraft Forge", which is a prerequisite for adding Mods.
2. Next, introduce "OptiFine", which is necessary to use correctly the resource pack.
(Note that there is another procedure to install only OptiFine, but this is different from this)
1. Install Forge
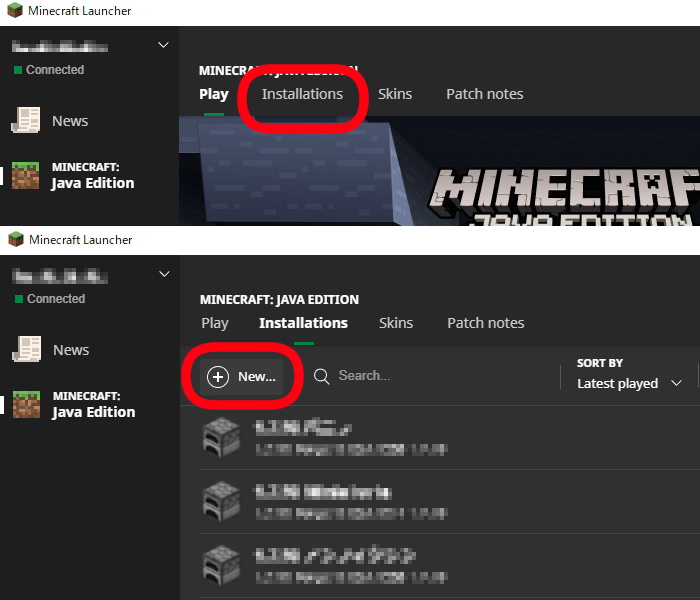
- First, create a launch configuration for 1.7.10 and launch it. Open Minecraft (Launcher) and click "Installations" tab in the menu at the top of the "Minecraft: Java Edition" tab. On the next screen, select "+ New" just below. (If you have already started 1.7.10, you can skip this step, go to 1-4.)
- Enter any name (for example, “1.7.10 vanilla”) in the "NAME" box and select "release 1.7.10" in the "VERSION" box. Finally, click "Create". At this time, if you want to create a "GAME DIRECTORY" dedicated to 1.7.10 (folder where are stored save data, mods, resource packs, etc.), create an empty folder on the desktop, etc. Browse and select the folder and click "Create".
- Click "Play" at the right end of the "1.7.10 vanilla". Or go back to the "Play" tab, select "1.7.10 Vanilla" you just created from the selection box at the bottom of the window, and click "Play" (Both are the same result). Then, Minecraft 1.7.10 in the default state (vanilla) will start. If it starts successfully, end the game.
- Go to Minecraft Forge download site and download the installer for 1.7.10 (this link is already for the 1.7.10 page). Select "Recommended" "Windows Installer" or "Installer" on the right.
- Double-click the downloaded exe file or jar file to open the installer window. Select "Install client" (selected from the beginning). The installe folder can be left in the "C: ~ .minecraft". Finally click "OK". If the dialog box says "Successfully installed ...", the Forge installation was successful! Click "OK" to close.
- Start Minecraft (Launcher) again. Open the "Installations" tab and click the "1.7.10 vanilla" created earlier. Then, the edit screen will appear, so select "release 1.7.10 Forge [version number] " from "VERSION".
- Change the "NAME" of installation from "1.7.10 vanilla" to "1.7.10 Forge" (you can use any name). You can also select "Resolution" (play screen size) as you like. Finally, click "Save".
- Click "Play" to launch Minecraft again. After a while, the title screen will be displayed, and if "Minecraft Forge ..." is displayed in the lower left, Forge installation is complete. After confirming, close Minecraft.
 1-1
1-1 1-2
1-2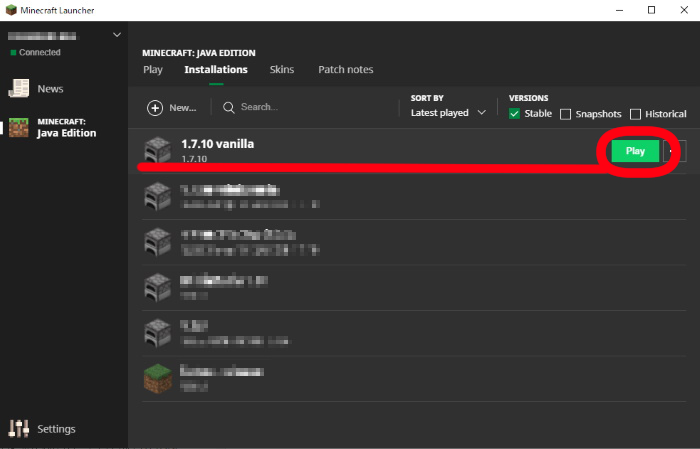 1-3
1-3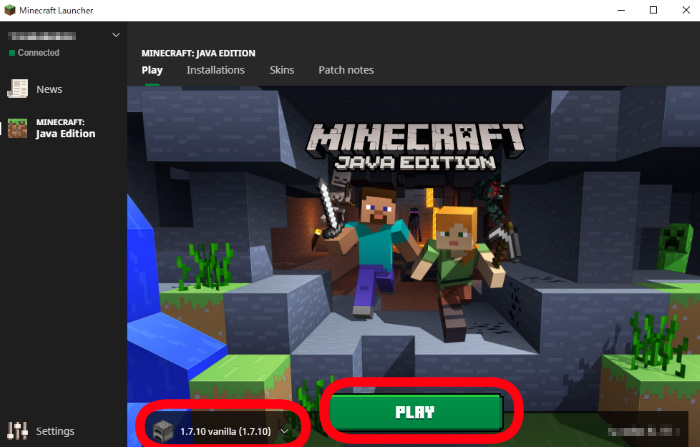 1-3
1-3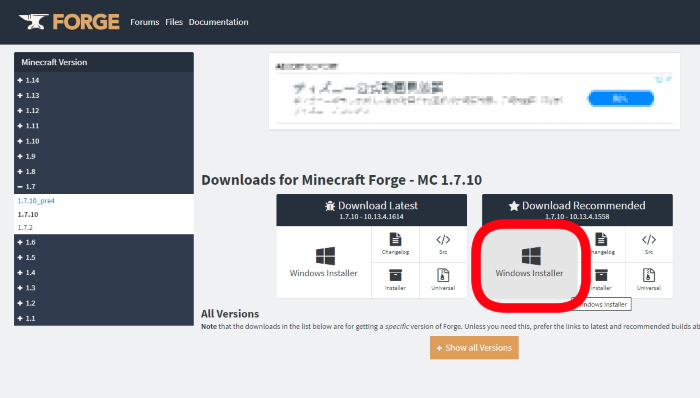 1-4
1-4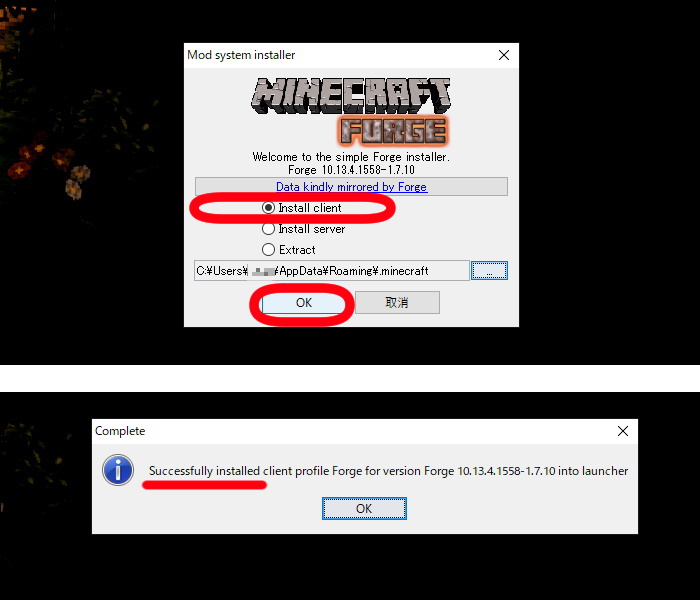 1-5
1-5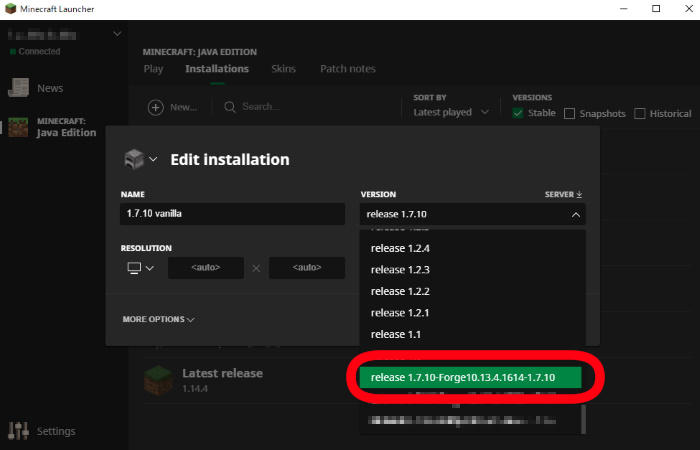 1-6
1-6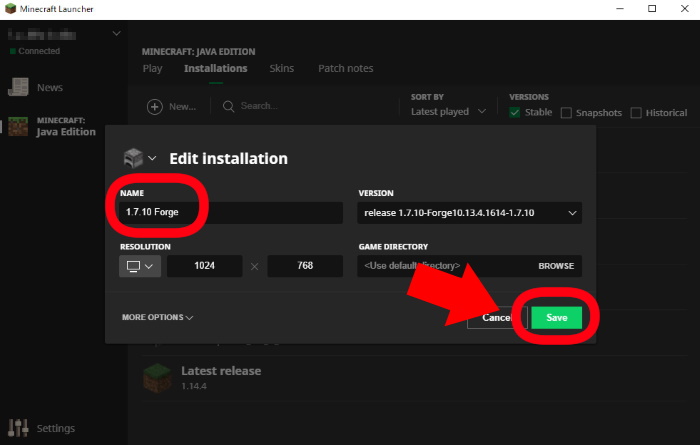 1-7
1-7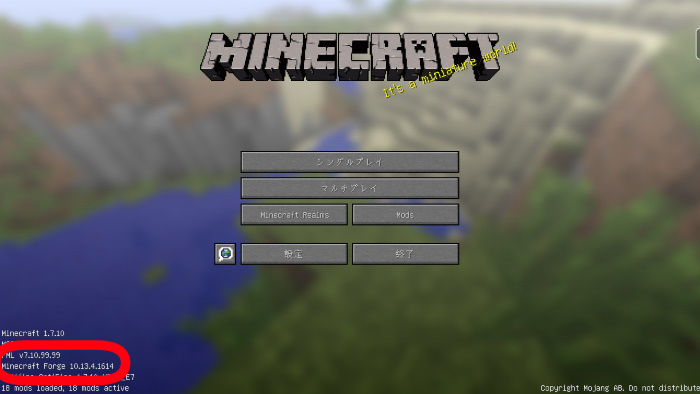 1-8
1-82. Install OptiFine
- Next, install OptiFine as a Forge Mod, so that OptiFine can work together with Forge. Go to OptiFine download site, and download the latest 1.7.10 version (OptiFine 1.7.10 HD U E7) at the bottom of the page.
- Open the ".minecraft" folder (if you created the folder yourself as a "game directory", go to 2-4). Open Drive C > User > [User Name], and click the "View" tab on the menu bar. If you check "Hidden file" on the right side, the hidden "AppDate" folder will be displayed.
- Open "AppDate" > "Roaming" and you will find the ".minecraft" folder. There is "mods" folder after installing Forge (if you can't find the "mods" folder, you may have failed to install Forge).
- There should be "1.7.10" folder in the "mods", so click and drag the downloaded OptiFine jar file (if you don't have "1.7.10" folder, create it yourself).
- Start Minecraft again ("1.7.10 Forge"). If OptiFine is displayed in the lower left, you have successfully installed OptiFine in Forge environment!
 2-1
2-1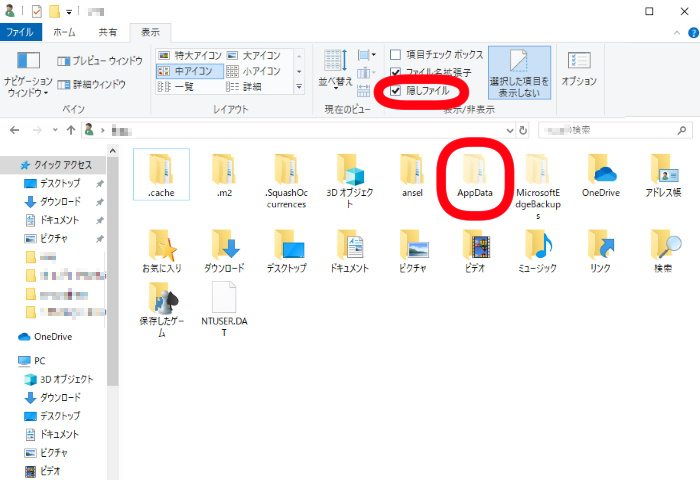 2-2
2-2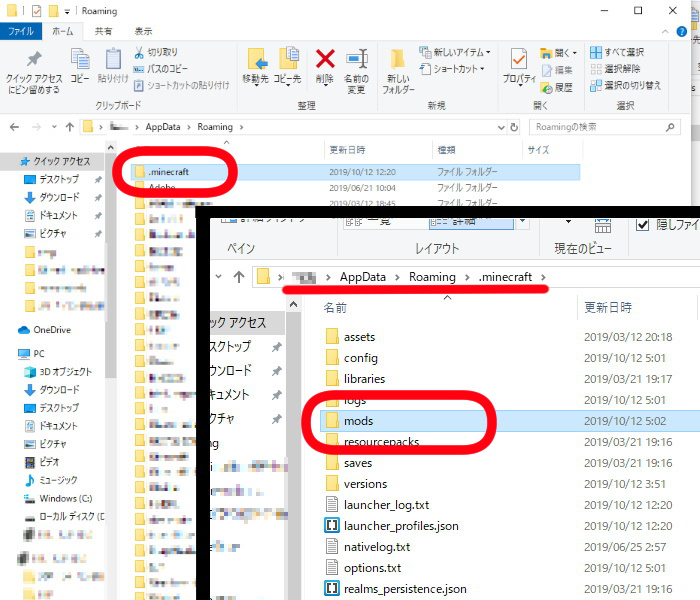 2-3
2-3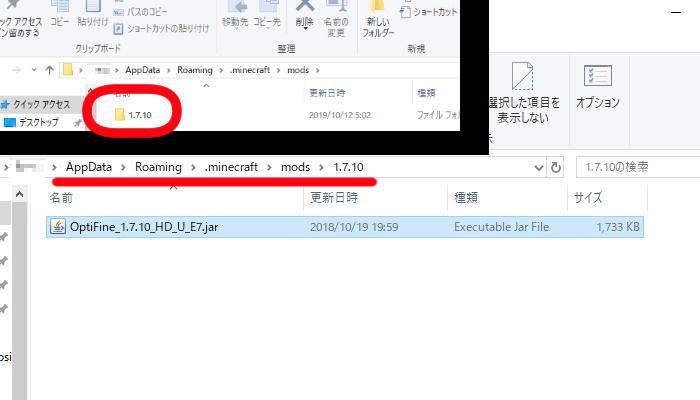 2-4
2-4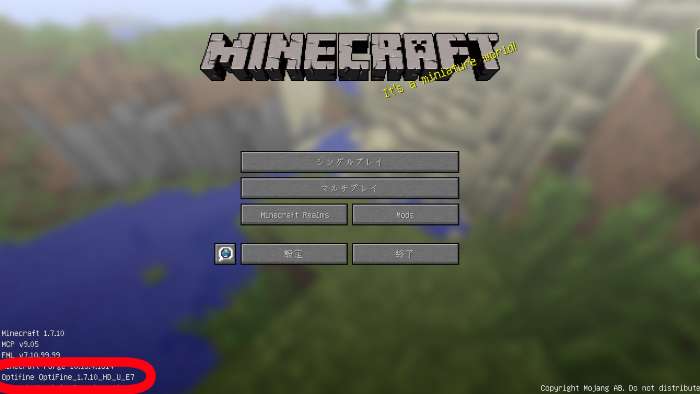 2-5
2-5